 |
|
|
ISS RealSecure 5.0 ISS was one of the first to produce a commercial Network Intrusion Detection System and RealSecure still tends to be the standard by which other NIDS products are measured. RealSecure 5.0 consists of the following components: Workgroup Manager - The Graphical User Interface (GUI) and the collected database from the sensors. This includes the RealSecure Console. Console - The central controlling point for the Sensors. The Console maintains a master database from which reports can be run, and it manages the Sensors deployed across the intranet. Network Sensor - This Sensor runs on a network segment, analysing the traffic flow and looking for intrusions and signs of network abuse. When an intrusion is detected, RealSecure can respond in a number of ways, including:
OS Sensor - This Sensor runs on a crucial computer system, monitoring user and administrator activity and watching for signs of improper system use or suspicious behaviour which might indicate an attacker has gained access. When an intrusion is detected, RealSecure can respond in the following ways:
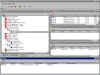
RealSecure Manager for HP OpenView 1.3 for NT - This product allows control of RealSecure Network Sensors with HP OpenView. This is an optional product. RealSecure Manager for HP OpenView 1.0 for Unix - This product allows control of RealSecure Network Sensors with HP OpenView. This is an optional product. RealSecure Manager Plus for Tivoli - This product allows control of RealSecure Sensors with Tivoli TES desktop. This is an optional product. Communications between the console and engines are fully authenticated and encrypted, and RealSecure will automatically lock down the Real-Secure-specific portions of the NT Registry to prevent the installation from being compromised in any way. Please note that this review concentrates only on the Workgroup Manager and Network Sensor components. By the time this report is published, RealSecure 5.5 will be available, the most noteworthy enhancement being the addition of a Network Node IDS component (known as the Server Sensor). Installation is very straightforward on the NT platform (the only platform we tested), with separate sub-directories on the CD for the Console and various Sensors. In an ideal world, the Console and Network Sensors should have dedicated machines (a combined Console and Network Sensor machine can be installed for evaluation purposes), whilst the OS Sensors can obviously be installed on any existing server. The Microsoft Database Access Components (MDAC) 2.5 and Internet Explorer 4.0 (required for the Help system) need to be installed on the Console machine if they are not already there. On all Sensor hosts, the ISS daemon is automatically installed as a Windows NT service or Unix daemon during installation. The daemon accepts commands from the Console and manages the Sensor. The output from the Sensor is directed to the appropriate log handlers. After a Sensor has been installed on a remote system, it is necessary to copy one or more of the Console’s public authentication keys to that system before the Sensor and Console can communicate over a secure channel. Great care needs to be taken when sizing the machine for the Network Sensor, since the number and power of the CPU’s and amount of available RAM can have a huge effect on the detection rate. A dedicated host is a must, and ISS recommends a minimum specification of Pentium II 300MHz with 256MB RAM – our advice would simply be to install the biggest and most powerful host with as many processors and as much RAM as you can afford if you are running RealSecure Network Sensor, since it is much more dependent on the power of the host than other products we have tested. The OS Sensor is a lightweight application, typically using 5 MB RAM and less than one per cent of the available CPU, since it is designed to reside on servers that are also being used for other tasks. The OS Sensor will run on NT 4.0 Server or Workstation Solaris SPARC 2.5.1, 2.6 and 7, IBM AIX 4.3.2 or 4.3.3, and HP-UX 11.0. Documentation is excellent – provided only as PDF files – and includes a Getting Started Guide, plus separate User Guides for the Console, Network Sensor and OS Sensor, and an excellent guide to the available signatures, with plenty of detailed information on what each attack is, and how it can be protected against. ISS also runs a range of excellent training courses on its products – including RealSecure. The Console consists of several windows, all of which display different types of information and provide access to different functions:
These are arranged in a default layout on starting RealSecure, and can be rearranged, activated or deactivated by clicking on menu entries or toolbar buttons. To monitor a Network or OS Sensor, an entry must be made in the Sensor window. A single Sensor can report to multiple Consoles at the same time, although only one Console is granted “master status”, which allows it to make changes to the Sensor’s configuration. Obviously, a single Console can also monitor multiple Sensors at the same time. However, one annoying problem in the current version of RealSecure is that each time you exit and restart the Console (which is necessary to clear the Activity Tree window, believe it or not) the list of Sensors is cleared. For an administrator whose job it is to monitor tens or hundreds of Sensors, this can be more than a little frustrating.
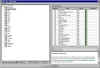
Right clicking on a particular Sensor allows access to a configuration menu. The most important configuration task is to assign a security policy, and eight default – and fixed – policies are provided with the system:
Most administrators will select one of the first two for safety, but this is not such a good idea on a heavily loaded network. RealSecure is a great hogger of resources and cannot handle a heavy network load on a 100Mbps segment when monitoring all attacks. Some thought thus needs to go into defining realistic policies that watch for a subset of the available attack signatures. Policy definition is certainly one area where RealSecure scores over many of its rivals. Select one of the existing policies and click on “Derive New Policy”, give it a name, and you are free to create your own policy using that as a template. There are four tabs on the policy definition screen:
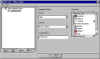
The Security Events tab lists all the available attacks in the signature database, and these can be enabled or disabled by clicking on a check box next to each one.
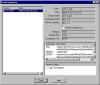
Selecting an individual attack brings up a detailed description of the attack (including its effect and how to counteract it) and a configuration screen. There is a wide range of attacks available, and new ones are added at regular intervals through the efforts of the ISS X-Force team. The Web-based update procedure is very straightforward and easy to use, and allows the administrator to download new signature files to the network and update individual RealSecure installations from those (the new signatures cannot be applied across the network, however, it is necessary to visit each Console to do it). The attack priority determines in which of the three Priority Alert windows it will appear, and for each event there are a number of responses available. These include:
Kill connection resets the IP connection to terminate the attack immediately, whilst the lock firewall option works with Checkpoint’s FireWall-1 to automatically reconfigure the firewall to prevent further attacks. Responses can be set globally for the policy, and then overridden on individual signatures if required. There is also an Advanced properties screen that provides the means to edit any additional parameters that might apply to a specific attack signature, as well as define how multiple events should be handled and propagated from Sensor to Console (rapidly occurring attacks can be consolidated into a single alert to prevent network floods) RealSecure can be used to monitor more than just security problems by using the Connection Events. These are generic events such as HTTP, FTP or SMTP activities, and can be filtered by source or destinations address, source or destination port, or protocol. One possible example of how this could be used would be if the administrator suspected certain employees of playing network Doom in company time. RealSecure could be configured to monitor for TCP port 666 and log the source and destination addresses of the perpetrators, perhaps killing the process too.
User-defined signatures allow the administrator to apply regular expression string matching on certain fields within a packet (login name, URL data, e-mail subject, etc.) to determine suspicious content. We used this as a “quick and dirty” virus checker by creating a signature that raised an alert every time it saw a packet with an e-mail subject containing the string “ILOVEYOU”. Finally, if there are genuine events which are raising false alarms via RealSecure, the Filter tab allows the administrator to define which packets should be ignored for alerting purposes, based on protocol, port or IP address. Once policies have been defined at the console they are applied to each engine as appropriate. Different policies can be applied to each engine, if required, depending on the expected traffic on any given segment, or perhaps depending on the importance of a segment. Unfortunately, having made changes to an existing policy it is left to the administrator to locate the Sensors that are using that policy and apply the changes to each one individually. It would be nice if RealSecure could operate in the same way as CyberSafe Centrax and inform the administrator of all the Sensors affected by the changes that have been made, and offer to apply those changes automatically. Once a Sensor is up and running with a policy applied, alerts are logged locally on the Sensor and transmitted in real time to the Console, where they are displayed in the Low, Medium or High priority Alert windows depending on their assigned severity level. Sensor log files can be synchronised with the Console logs at regular intervals for permanent storage. Events are also displayed in the hierarchical Activity Tree window, sorted and grouped by source address, destination address, or event description. Expanding the branches of the tree allows the administrator to drill down for more detail, and the Event Inspector window displays complete details of individual events, showing source and destination addresses, packet contents and actions taken. The session playback facility allows recorded sessions (recorded as a result of the appropriate action being set on an attack signature) to be replayed and viewed in real-time or packet by packet.
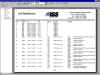
Unfortunately, if you want to clear the Activity Tree window, the only way to do this is to close down and restart the RealSecure Console, and this necessitates reselecting all the Sensors to be monitored – highly inconvenient. There are also some other rough edges to the user interface where some standard Windows conventions are not followed – there are no maximise/minimise window buttons when defining policies, for instance, and there is inconsistent use of right-clicking and double-clicking in some places. The interface requires some tidying up. After Sensor logs have been synchronised and uploaded to the Console log (the Console log consolidates log files from all Sensors that report to it), the administrator can generate a number of text and graphical reports that summarise network activity. These reports essentially record the date, time, source and target of attacks. There are a number of built-in reports available. Common reports:
OS Sensor Reports:
Network Sensor Reports
Reports can be viewed on screen, printed, or exported in a range of formats including plain text, Lotus 123, Excel, and Word, amongst others. There is very little scope for customisation within RealSecure itself – you would need to purchase the Crystal Reports Designer software to achieve that. There is also not much in the way of hyperlinked data or drill-down capabilities with the on-screen reports, making forensic examination more difficult than it should be. As we mentioned in the introduction, RealSecure is often the standard against which other NIDS products are measured. However, in some areas it does not quite measure up itself. The current version struggles to maintain detection rates at high network loads (though we are promised that this will improve), necessitating careful thought and planning by the administrator to determine which signatures should be monitored by which Sensors on heavily loaded networks. The net result is that it is usually necessary to deploy multiple RealSecure Sensors on heavily loaded network segments in order to provide comprehensive attack coverage. However, at least the modular architecture allows this to happen, and policy definition is extremely friendly and flexible, making RealSecure one of the most straightforward and intuitive IDS to manage that we have seen. With clear and unambiguous alerting, a wide range of alert responses, and excellent real-time console and extensive attack signature database, RealSecure is still well worth considering when placed in the right environment. Company
name: Internet Security Systems Address: ISS
EMEA: Click here
to return to the ISS RealSecure Results
|
 |
Send mail to webmaster
with questions or
|